Overview
Wistia is a premiere video hosting platform. While many
services provide basic video playback, Wistia crushes the competition when it
comes to analytics and advanced tooling. It’s these features that make Wistia a
perfect integration with Rock.
Configuring the Integration
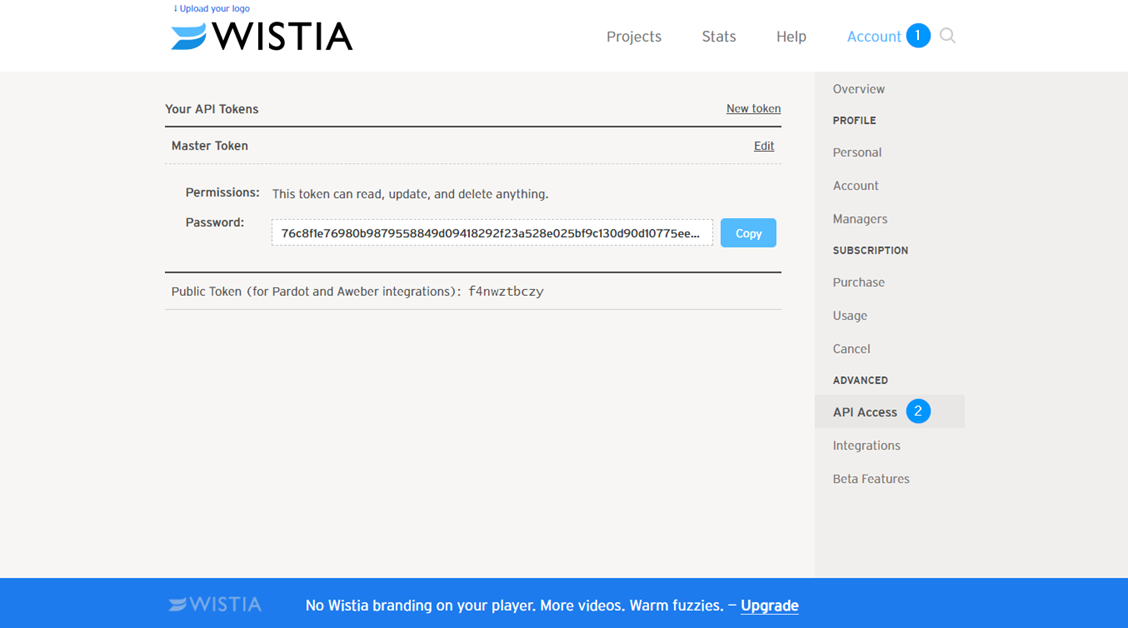
Configuring the integration is super simple. To link your
Wistia account you’ll need to start by finding your Wistia API key. This can be
found by logging into Wistia and selecting ‘Account > Settings > API
Access’. If you don’t see an API key here, you can create a ‘New Token’. Once a
key is displayed, copy it, and then head back over to your Rock Server.
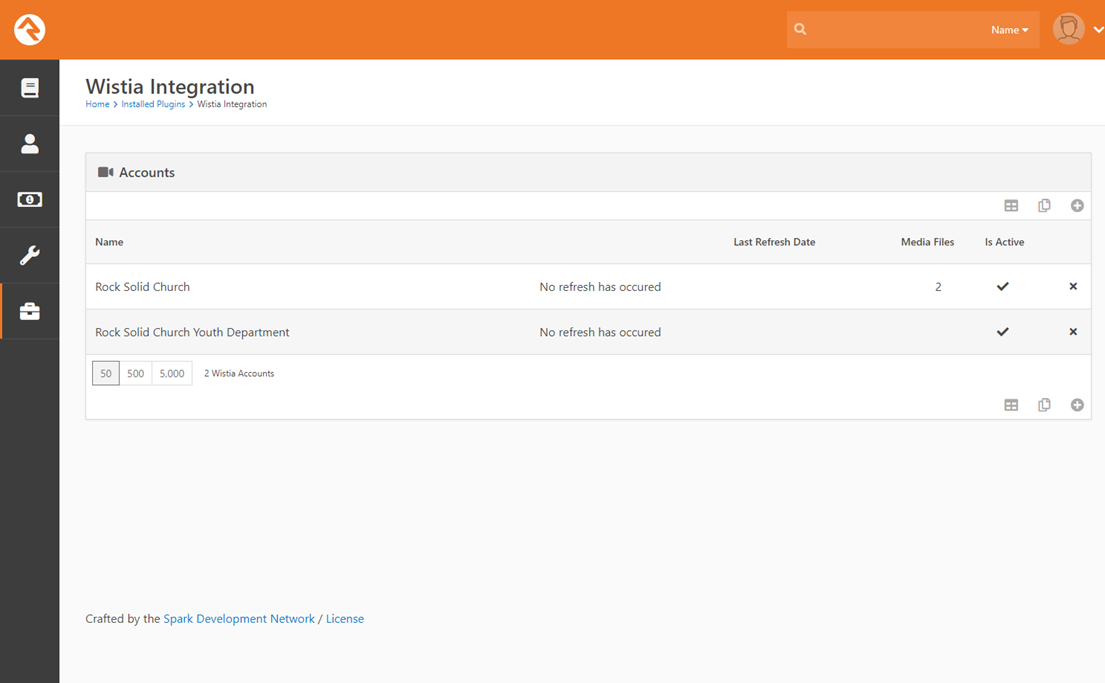
To add your key to Rock, navigate to the Wistia integration
pages under ‘Admin Tools > Installed Plugins > Wistia Integration’. Here
you can add a new account, providing it a name and the API key you just copied.
Tip
You might consider moving the Wistia Integration pages
to a new area of Rock to allow for more of your staff to access it.
During the integration installation, a new Rock Job was
configured. This job syncs the videos that you have uploaded to Wistia, as well
as downloads the watch analytics. This job is configured to run every four
hours, but you may wish to run these activities more often. You may initiate a manual run of the Wistia
Integration Job from ‘Admin Tools > System Settings > Jobs Administration’.
Wistia Analytics
Once the sync has run, you should now have access to the
Wistia analytics inside of Rock. To take a look, pop over to ‘Admin Tools >
Installed Plugins > Wistia Integration’. Here you’ll see a listing of all
the accounts you have configured. You can also add additional accounts on this
screen.
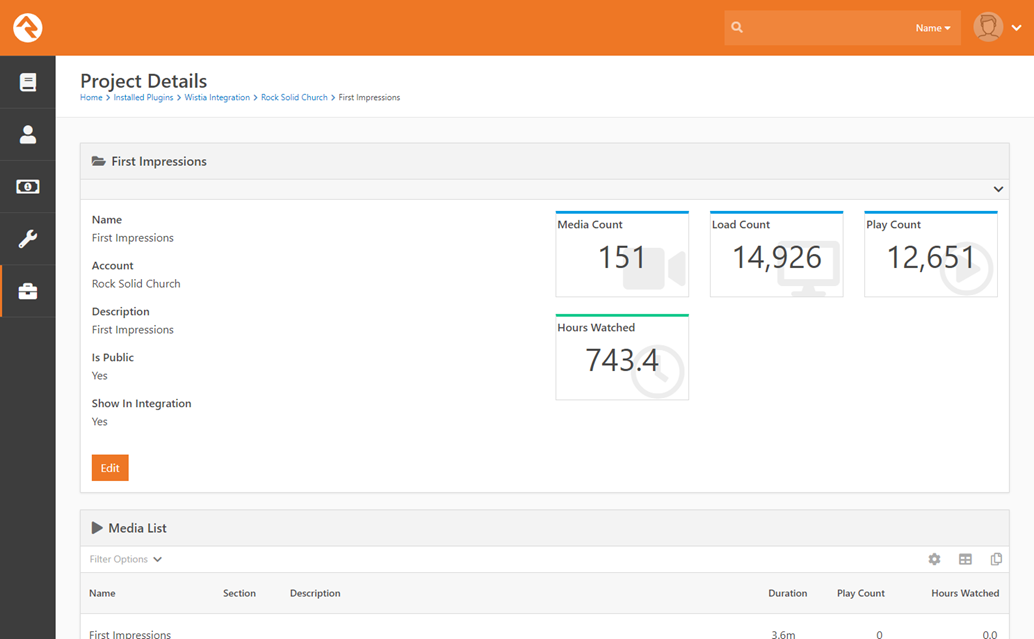
Next, you’ll see analytics for the entire account as well as
a list of projects in the account.

Selecting a project will show analytics for the specific
project as well as a list of media assets attached to the project.
Selecting a specific media will show you analytics for this
specific video. These analytics include details about each watch.
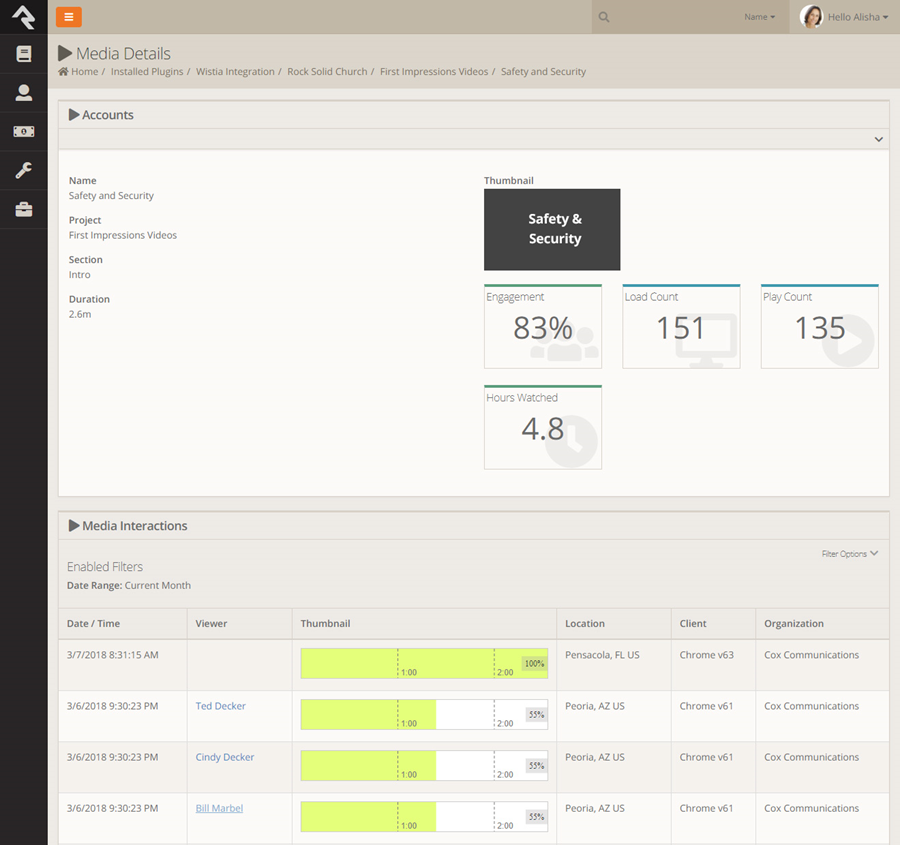
The embed code that Rock uses ties these videos to a
specific individual in Rock. This allows you to see who has watched what in the
database. In order for this to happen, the individual does need to be logged
into your Rock website. Don’t worry though… Wistia does provide a persistent
user identifier even if they aren’t logged in (cookies… yum). So, as long as
the individual logs in to watch a video in the future, the integration will go
back and tie all their previous watches to their record. I know right?! So… how
can you help this along? We’re glad you asked…
On occasion you might add a video to a page on Rock and
email out a link to it (make sure this video has content of value so you don’t
waste their time). When you email out the link, you can add a token that will
auto login the individual (this works even if they don’t have a Rock
username/password). This will link the person and update all previous watches.
Wistia Field Types
The Wistia integration comes with two new plugin field
types.
Wistia Media
The Wistia Media field type allows you to link videos in
Wistia as an attribute on any Entity that supports them in Rock. The most
common usage would be as attributes on content channel items, but use them as
you will. This field type is very customizable.
The organization structure of videos in the Wistia
integration is:
Wistia Account > Project > Media File
This field type allows you to let individuals select all
three settings or limit them to a specific account or account/project
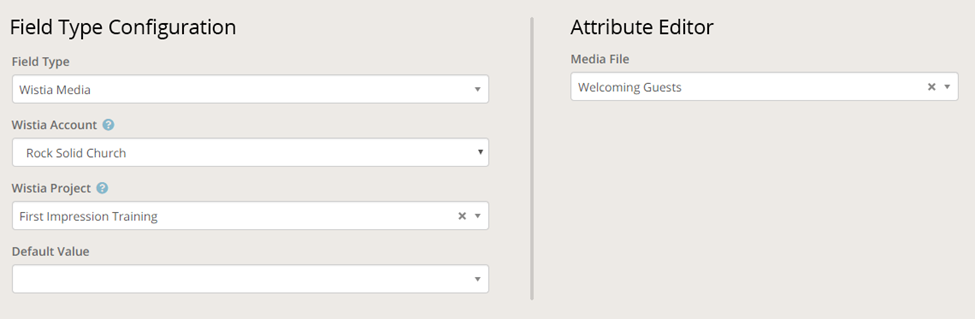
combination. Let’s say your content channel is storing information about a
specific type of training. It’s likely you would create a new Project in Wistia
to hold videos for the training. In this case you would want to limit the
selection of videos in Rock to videos in that specific project. This
configuration is show below.
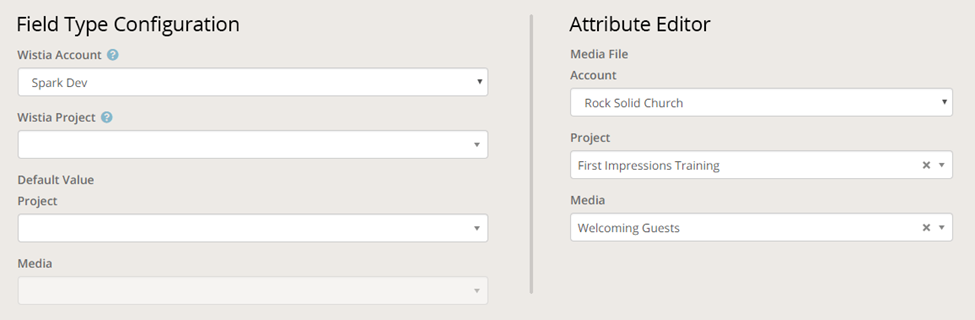
Now let’s say you have a content channel that’s used to
store all types of videos. In this case you would like authors to be able to
pick any video in Wistia. This configuration would allow that use case.
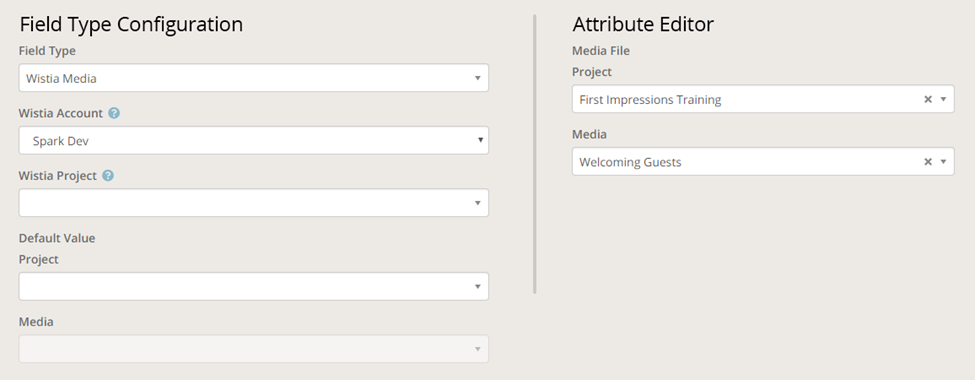
Finally, you can also limit the select to all videos in a
specific account by selecting only the account. Now authors can only pick the
project and video.
Note
When showing the lists of projects and media files,
Rock is retrieving the information directly from Wistia. This is done so you
don’t have to wait for the sync to occur for files you may have just uploaded.
In some cases, you’ll see a thumbnail in Rock that says the file is not yet
synced because of this.
When an attribute is set to ‘Display on Grid’ the synced
thumbnail from Wistia will be shown.
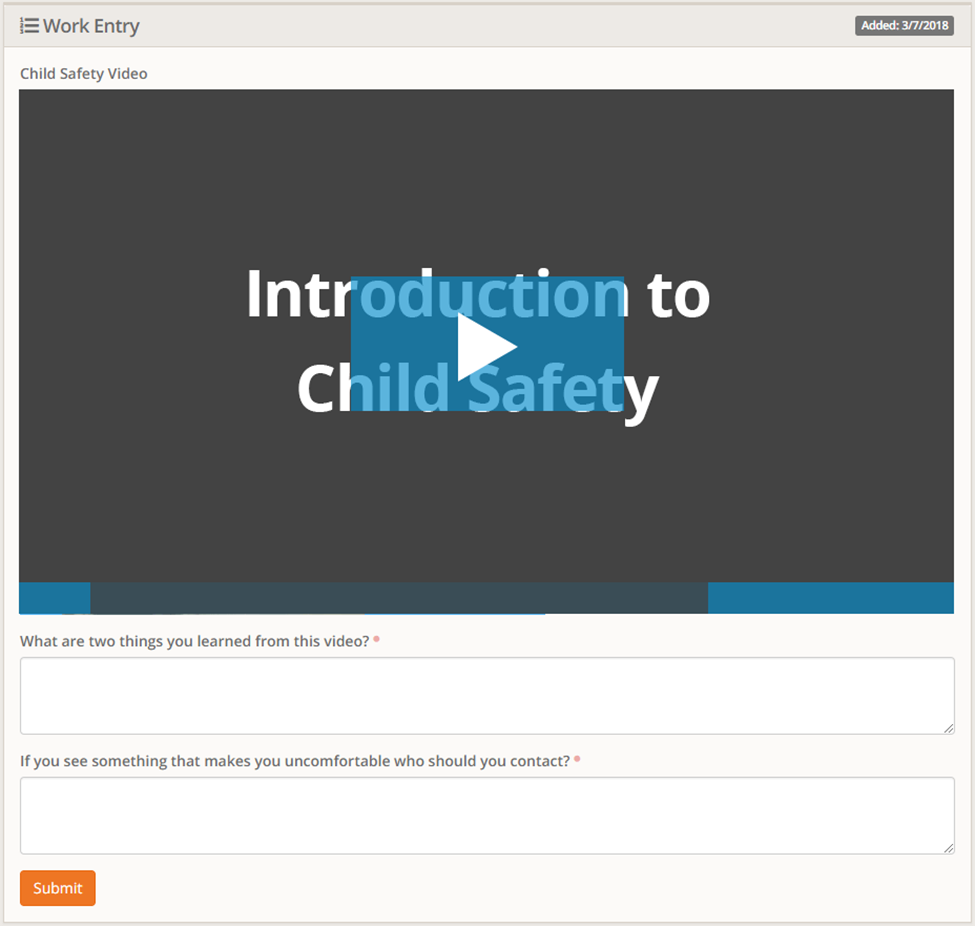
Wistia Media Watch
The next field type that ships with the integration allows
you to display a Wistia video on a workflow entry form and ensure that the
individual watches a defined percentage of the video before they are allowed to
continue with the form.
Note
This is a pretty unique field type and is only meant
for use on workflow entry forms.
Let’s say you wanted to ensure that someone watched a video
and then answered a couple of questions. You would create a new Workflow Type
for this online class. This workflow type would have an attribute of type
‘Wistia Media Watch’ for displaying the video and perhaps a couple of extra
attributes to hold the answers to the questions.
You might be wondering about those who might scrub ahead to
the end of the video. The algorithm used takes this into consideration. The
percentage is really the percentage of seconds that they actually watched the
video. Scrubbing is allowed (to go backwards to replay) but skipping ahead
won’t help them.
Below is the configuration of the attribute for showing the
video.
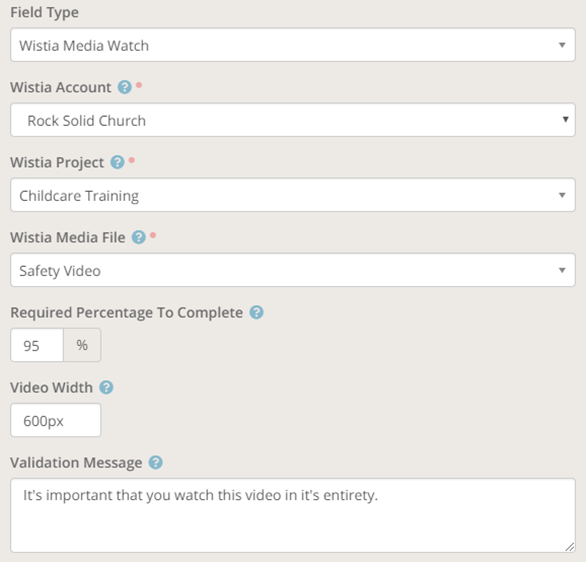
Configuration Details
- Media - You must select the media file you want to display by selecting the Account, Project and Media file.
- Required Percentage To Complete – This field determines what percent of the video the individual must watch in order for it to have been considered watched. You might be tempted to make this 100%, but realize that they may pause the video very near to the end or press the submit button after the speaking is over, but before the video is 100% done.
- Video Width – Determines how wide the video should be displayed. This can be in units of pixels (500px) or percentages (100%).
- Validation Message – This defines the message to show the individual when they have not completed the video.
The workflow entry form for this example would look
something like the figure below.
Lava Shortcode
The integration also ships with a Lava shortcode for making
Wistia embeds easy and customizable. The details of using the shortcode can be
found under ‘Admin Tools > CMS Configuration > Lava Shortcodes’.
Below is a listing of the various options that the shortcode
provides.
- embedcode (required) – The Wistia id of the video.
- width (100%) – The width you would like the video to be. By default it will be 100% but you can provide any width in percentages, pixels, or any other valid CSS unit of measure.
- contentchannelitemid – If you would like to tie the playback of the video to a specific content channel item you can provide its id here and the integration will create the link for you.
- entitytypeid – The integration can also link the video to an entity of another type.
- entityid – The id of the entity to link the playback to.
- playercolor - The color to use for the player (#ee7725)
- autoplay (false) - Whether or not you'd like the video to autoplay.
- showplaybutton (true) - If set to true, the big play button control will appear in the center of the video before play.
- showsmallplaybutton (true) - Determines if the small play button in the bottom toolbar should be displayed.
- showsettingscontrol (true) - Whether or not the settings control should be displayed in the toolbar.
- showvolumecontrol (true) - If set to true the volume control will be displayed in the toolbar.
- showplaybar (true) - If set to true, the playbar--which includes the playhead, current time, and scrubbing functionality--will be available.
- showfullscreenbutton (true) - If set to true, the fullscreen button will be available as a video control.
- donottrack (false) - By default, data for each viewing session is tracked and reported back to the Wistia servers for display in heatmaps and aggregation graphs.
- controlsvisibleonload (true) - If set to true, controls like the big play button, playbar, volume, etc. will be visible as soon as the video is embedded.
- endbehavior (default) - This option determines what happens when the video ends.
- default - The video stays on the last frame.
- reset - The video shows the thumbnail and controls if they are set to be visible on load.
- loop - The video plays again from the beginning. The video plays again from the beginning. The video plays again from the beginning.
- enablegoogleanalytics (true) - If you're using Google Analytics on the page where you embed a video, the video will auto-magically send events to your Google Analytics account.
Adding Media To Content Channels
Adding Wistia videos to content channels is one of the more
common usage scenarios of this plugin. You’ve already seen how easy it is to
setup the attribute to a content channel. Let’s look at how to format the video
using Lava and the Content Channel View block.
For details on the Content Channel View block be sure to
first read the ‘Designing and Building Websites Using Rock’ manual (https://www.rockrms.com/Rock/BookContent/14#addingchannelcontenttopages).
Below is a simple Lava template that shows how you can place
your videos on the page.
{% for item in Items %}
    <h1>{{ item.Title }}</h1>
    {{ item | Attribute:'VideoAttributeKey' }}
    <hr />
{% endfor %}
Super simple, right? Using the attribute in this way places
a Wistia player right on the page. The default usage is a responsive player
(e.g. fills 100% of the width of the page) with the default player bells and
whistles. It is also smart enough to add all the configuration to link the
currently logged in user. But… what if you want more control over the player
experience?
Check out this more advanced example.
{% for item in Items %}
    <h1>{{ item.Title }}</h1>
    {% assign mediaEmbedCode = item | Attribute:'Video','RawValue' %}
    {[ wistia embedcode:'{{ mediaEmbedCode }}' width: '50%' showplaybar:'false' contentchannelitemid:'{{ item.Id }}' ]}
    <hr />
{% endfor %}
Still pretty simple, right? In this case we selected to get
the ‘RawValue’ of the attribute and then use it in the Wistia shortcode. Once
we do this, we get all of the configuration options that the shortcode
provides.
Linking Individuals to Watches
As you have seen it’s incredibly powerful to see who has
engaged with media. Obviously, the best way to make these links is to encourage
people to login to your website. When this occurs the Wistia integration will
automatically create the links for you. If however, the individual was not
logged in, it’s not too late to be able to link the watch.
When a person watches a Wistia video on your page they are
assigned a unique identifier (stored in a cookie). If in the future they ever
do watch a video on your site while being logged in we can go back and assign
previous watches to the individual. So, the question becomes, how can we
encourage that? Glad you asked!
To help move this process along you should occasionally send
out emails to your active membership that links them to a video hosted on your
site. When you provide the link, you’ll also include a special token that will
automatically login the individual (even if they don’t have an account this
will work).
Below is a sample email template you can use to configure
this.
Hello {{ Person.NickName }}!
We have an important update we wanted to share with you on what’s coming up later in the year. Checkout this short video using the link below.
http://rocksolidchurchdemo.com/whatsnew?rckipid={{ Person | PersonTokenCreate }}
Obviously, you’ll do a much better job crafting the
messaging, perhaps even adding an image to represent the video to use as the
link.