Overview
The storage mover plugin allows you to move files that were
uploaded to one storage provider and move them to a new location. For instance,
you can move person profile images that were uploaded into your database to a
cloud storage solution like Cloudinary, Amazon S3 or Azure.
Note
You will also need to have the plugins for
these storage providers purchased and installed for this to work.
Configuration
Warning
Be sure to make a backup of your database
and file system before using this plugin, just in case things don’t go as
planned.
The first step of the process is to configure the File Type
that you would like to transition to use the new Storage Provider. The Storage
Mover plugin uses the current settings of the File Type to use as the
destination. This ensures that future files use the same settings. Keep in mind
that a File Type’s storage provider can change at any time. New files will use
the new settings. Existing files will still be retrieved using the settings
from the time the file was uploaded. The Storage Mover simply transitions the
files to a new location.
Once your File Type’s settings have been updated, proceed
over to the Storage Mover page (initially installed under ‘Admin Tools >
Installed Plugins > Storage Mover’).

The first screen provides a nice reminder of the importance
of backups. Once you have backed up your database and web server files system,
press the ‘Continue’ button.
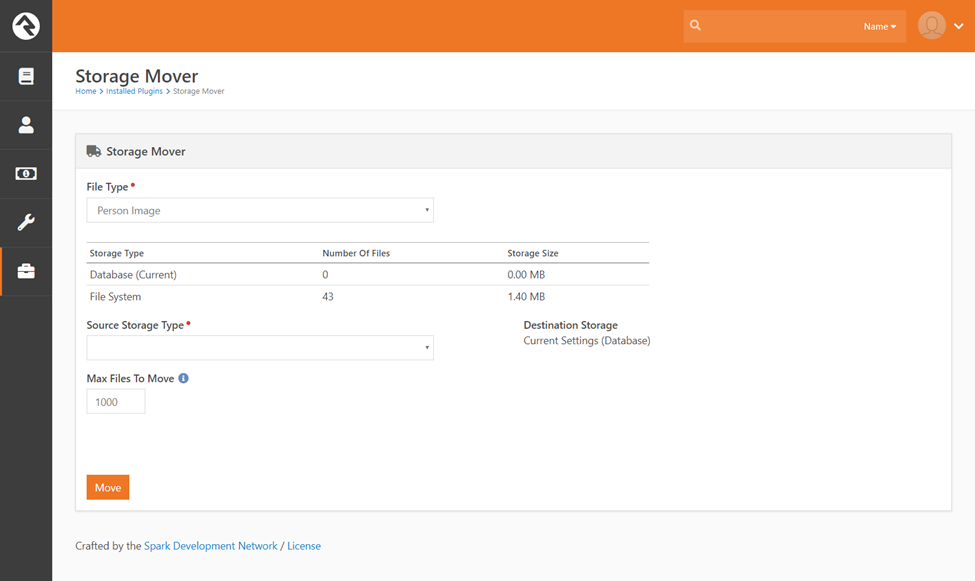
The next screen allows you to pick the File Type that you
wish to move. It will report how many files are in each previously configured
storage provider, as well as the combined file size. From here you’ll select
the source storage provided (the place you want to move the files from). The
destination location will be the currently configured storage provider.
You also have the ability to limit how many files to move at
a time. This is helpful in two ways:
- To test the moving of files, enter 1. This will move the first file and provide a link to the file at the new destination. This allows you to test with a single file.
- Transitioning the file to a Cloud storage location can take a while. How long will depend on the size of your files and the speed of your connection. A good rule of thumb, however, is 1 second per file. If you have several thousand files, it’s a good idea to transfer them in batches.
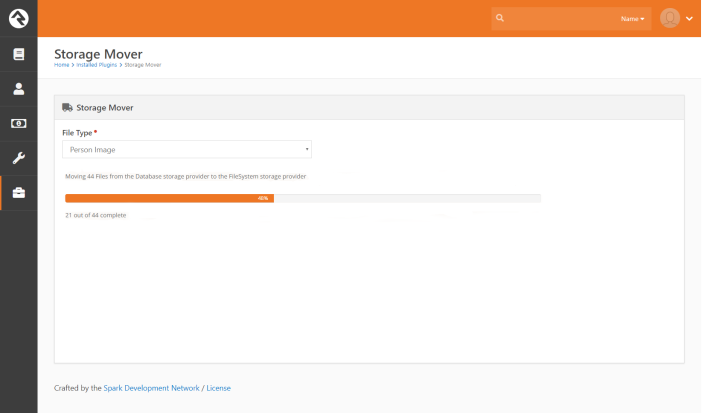
Once you have configured the move options, press the ‘Move’
button.
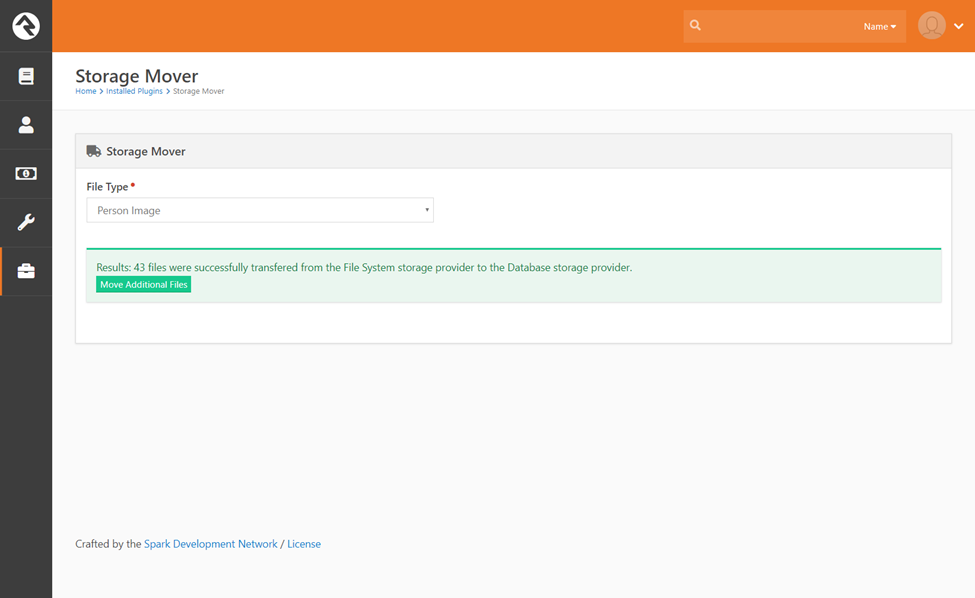
Once the files have all been moved, you’ll see the screen
below. Simply refresh the page to start another move.