What is Cloudinary
So you may be thinking to yourself, “Another
storage provider… why do I need another one?” Well, Cloudinary is no ordinary
storage provider. Sure it can hold all your files in the ‘cloud’ just like
Amazon S3 and the Azure File Storage provider. But what makes Cloudinary
special is what it can do to transform your files as you load them. Enticed…
well read on!
Cloudinary really shines with images. Once
you upload an image to Cloudinary it can be retrieved with hundreds of
different filters and transforms. For instance, it can:
- Resize your image
- Apply color filters
- Compress your images (unless you’re really diligent, most of the files you put on your website can be compressed by up to 60% without losing any quality)
- Blur your image
- Create thumbnails
- Rotate / Flip
- Text Overlays
- And many, many more...
But words are cheap. Check-out their demo
site for more details:
https://demo.cloudinary.com/?mode=default
You can also create a free account, which
gives you the ability to store 75,000 files and apply 7,500 transforms a month.
But wait there’s more! More than just images Cloudinary can also do
some cool things with files. For instance, it can make image thumbnails from
PDF files.
To make all this magic just a little easier,
we’ve even included a set of Lava filters to help simply the transforms. More
on that later!
Setup and Configuration
Cloudinary Account Setup
Eligible nonprofits can receive a
significant discount on all Cloudinary plans. Details can be found at https://cloudinary.com/solutions/industries/cloudinary-for-nonprofits. For existing Cloudinary customers the best
way to receive the discount is to contact Cloudinary support via https://support.cloudinary.com/hc/en-us/requests/new and leaving the “Cloud Name” field blank.
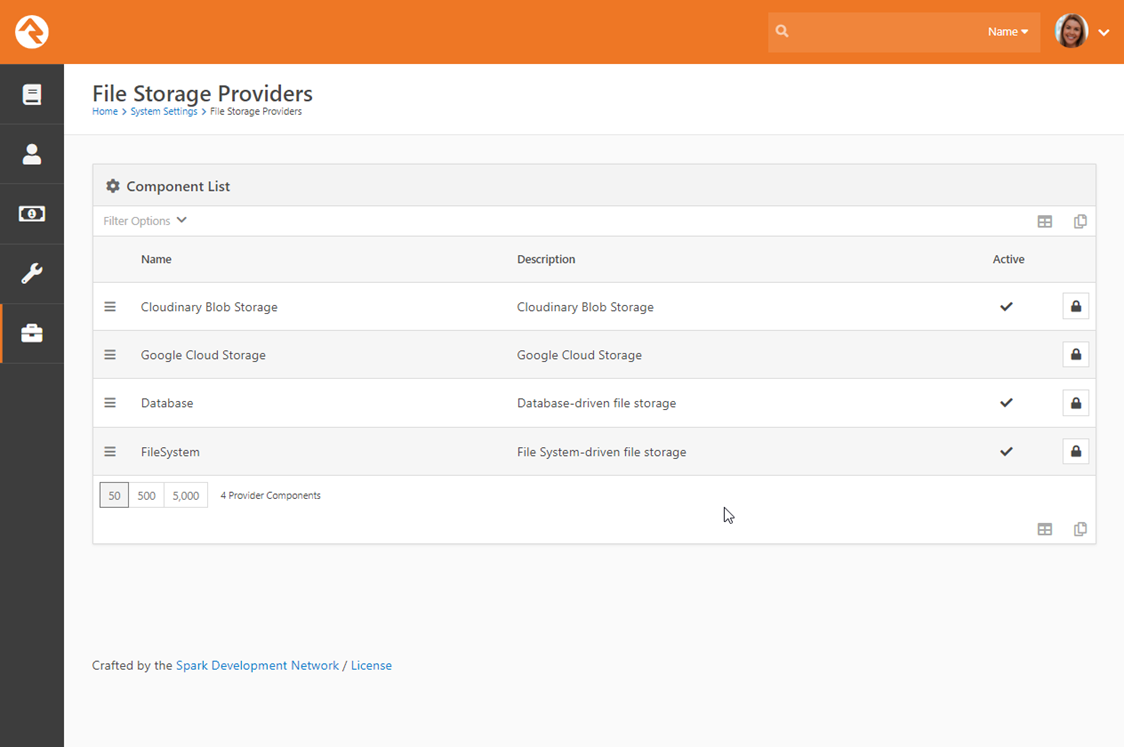
Storage Provider Setup
Once this package is installed, you’ll notice a new storage
provider under ‘Admin Tools > System Settings > File Storage Providers’
called ‘Cloudinary Blob Storage’. This new provider is inactive as it requires
additional configuration.
In order to setup this provider you will need three settings
from your Cloudinary account; the Cloud Name, API Key and API Secret. You’ll
find these under “Settings > Security” in your Cloudinary account. Once you
find these, enter them into ‘Cloudinary Blob Storage’ provider settings.
Binary File Type Setup
Now that you have your storage provider configured, you can
now setup file types to use it. To setup a new file type, navigate to “Admin
Tools > General Settings > File Types”. When you add the new file type
you will need to be aware of three new settings.
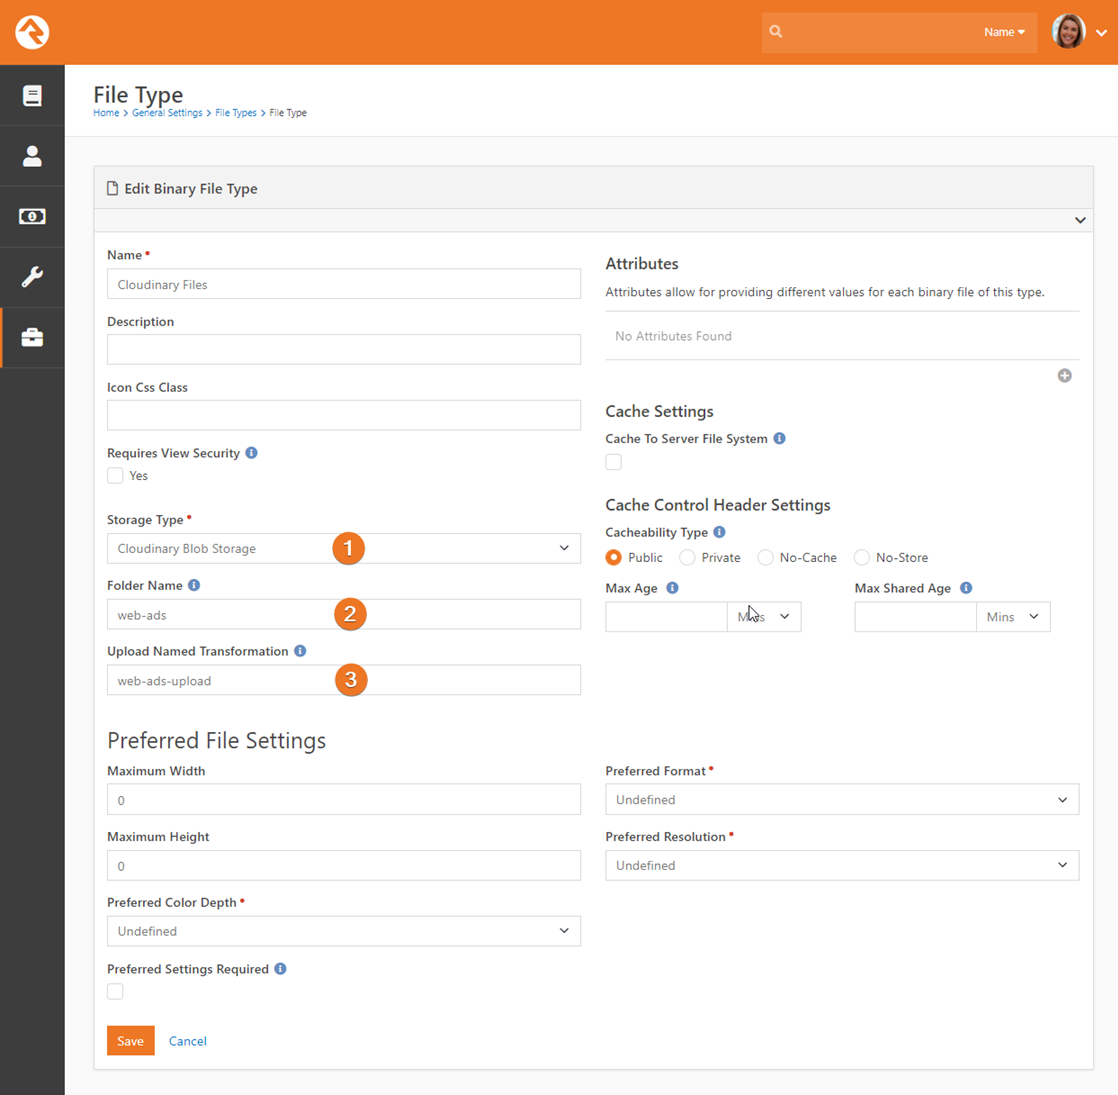
- Storage Type: Set this the ‘Cloudinary Storage’.
- Folder Name: The folder name you would like to use.
- Upload Named Transformation: The named transformation to apply to all uploaded files. Leave blank to store the original file without modification. Named transformations can be defined inside of the Cloudinary Admin site.
Once you have setup the file type(s) you’re now ready to
configure your attributes to use them just like you would any other storage
provider.
Cloudinary Account Configuration
Being able to store your files in folders based on the file
type makes you feel like an organization guru. Unfortunately, by default you’ll
need to create the folders in Cloudinary manually before you can upload them
unless you enable the ‘Auto-create Folders’ option on your account. You can do
this under ‘Settings > Upload’. Once enabled the folders you set in Rock
will automatically be created in Cloudinary (so cool we wonder why that’s not
the default?)
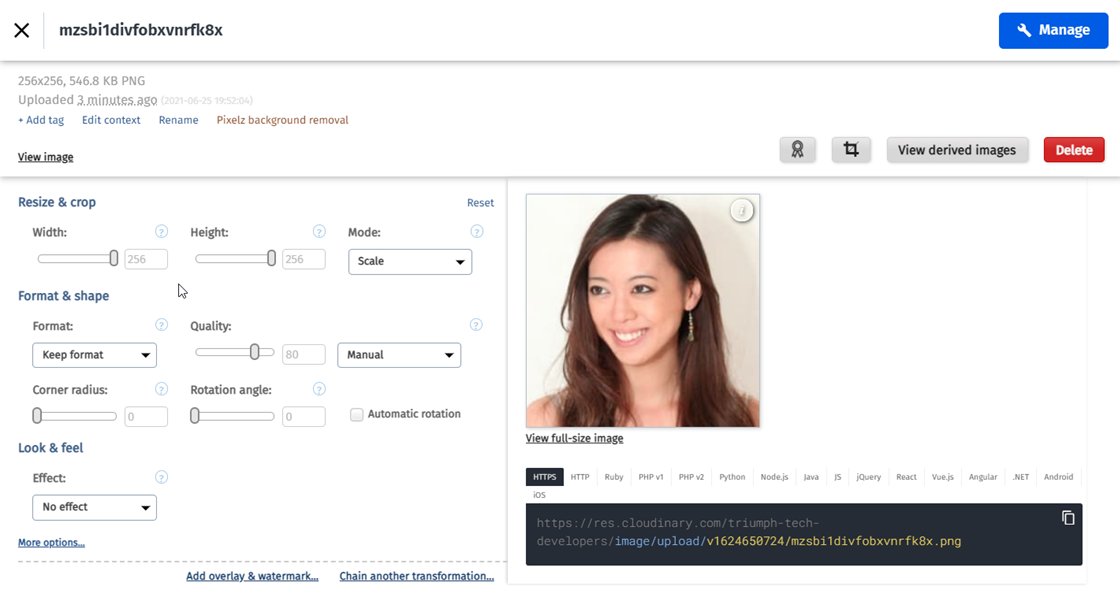
Using Cloudinary
You’re now ready to upload images and documents and apply
transforms to them. You apply the transforms by using small commands in the URL
to retrieve the images. While we provide some Lava filters to simplify the
process, you’ll still need to provide the transform codes. The best way to do
this is to use the transform explorer inside of your Cloudinary account. Simply
click edit on an image under the ‘Media Library’ and select the transforms you
wish to apply.
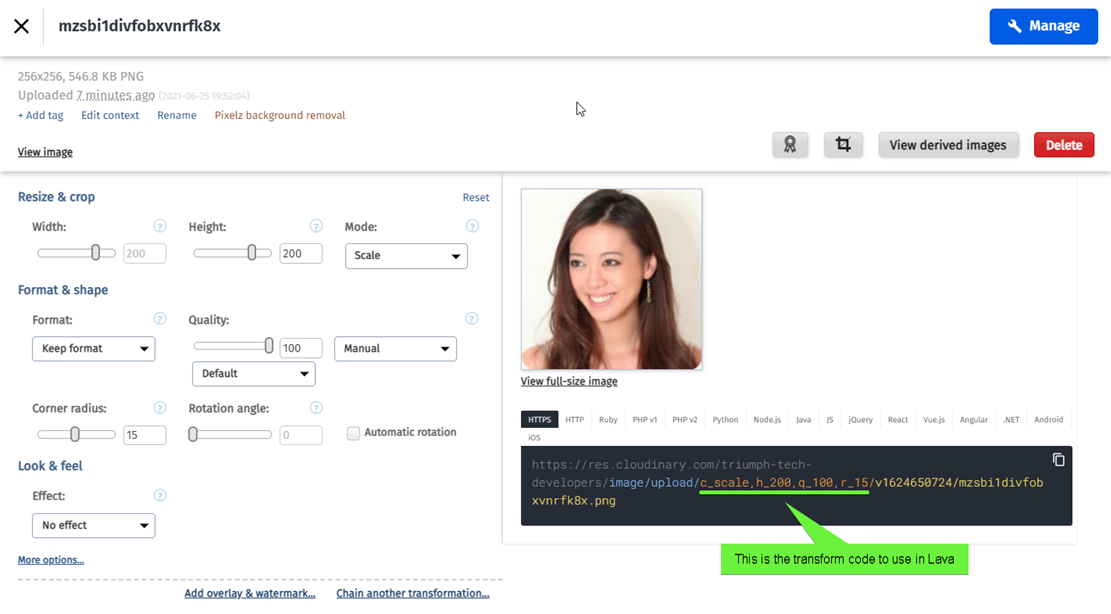
As you apply transformations the URL will update to include
the transform code. The transform code can be used in Lava.
OK, now that you have your transform code, let’s see how we
can use it in Lava. To do this let’s look at a basic Lava template for viewing
images from a content channel.
First, let’s look at the typical Lava for listing images
from the Web Ad content channel.
{% for item in Items %}
    {{ item | Attribute: 'Image' }}
{% endfor %}
You probably recognize that the formatted value of an Image
attribute is a HTML image tag. That won’t work for us as we need to modify the
URL of the image a bit. So instead you’ll use.
{% for item in Items %}
    <img src="{{ item | Attribute: 'Image','Object' | CloudinaryTransform: 'c_scale,h_200,q_100,r_15' }}" />
{% endfor %}
Notice here that we get the object value of the Image
attribute and pass it through to the ‘CloudinaryTransform’ Lava filter with the
transform code. A few details about this Lava filter:
- You can provide the full BinaryFile object (as we did above) or simply the BinaryFile object’s Path property. Either will work for you.
- There may be times when you need to iterate over a collection of channel items where some of the images were not uploaded to Cloudinary. Not to worry! The ‘CloudinaryTransform’ filter will work fine with files uploaded through other storage providers, but the transforms will not be applied.
Viewing Document Thumbnails
The Cloudinary storage provider can also help you make
thumbnails out documents (note: please read the Cloudinary documentation on
supported file formats without additional fees only PDFs are supported).
So let’s say that you’ve uploaded a PDF file, and you’d now
like to display a thumbnail for it. That’s as easy as:
{% assign document = item | Attribute: 'Document','Object' %}
<img src="{{ document | CloudinaryDocumentConvert: 'jpg' }}" />
Results

(Unlike the image transformation Lava filter the CloudinaryDocumentConvert
does require the full BinaryFile object)
OK so that’s cool, but the image is pretty large. No
problem… you can pass in transform codes
into the conversion like so:
{% assign document = item | Attribute: 'Document','Object' %}
<img src="{{ document | CloudinaryDocumentConvert:'jpg','w_200' }}" />
Results
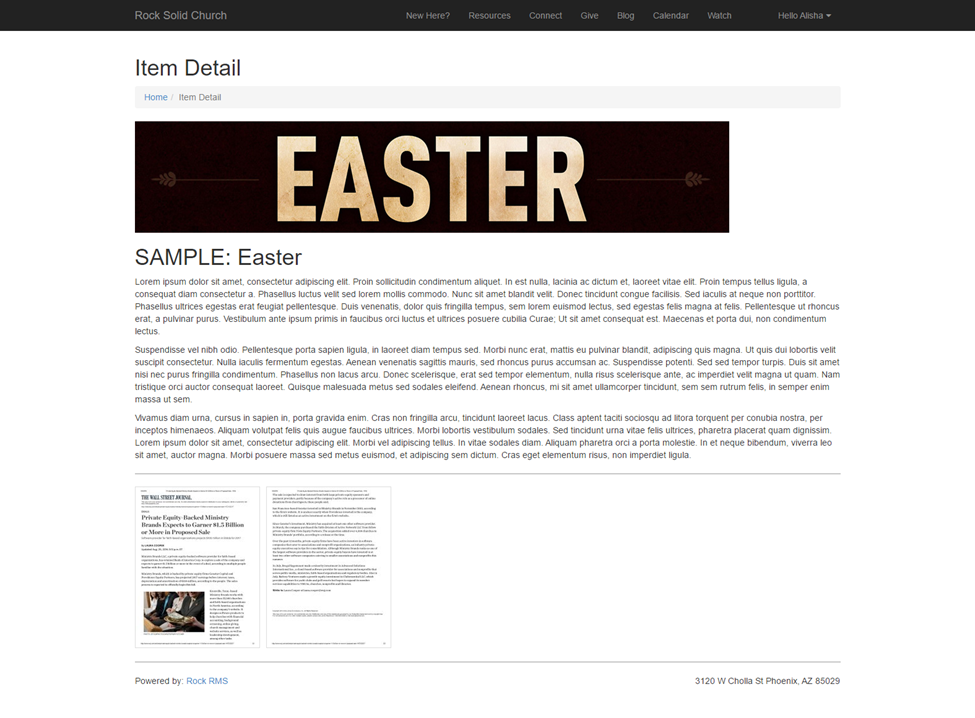
Alright! Now we’re cooking with gas! But say you want
thumbnails of all the pages of the PDF. We‘ve got you covered. When the PDF
file is uploaded, Cloudinary returns how many pages it was. We remember that
for you so you can do something like:
{% assign document = item | Attribute: 'Document','Object' %}
{% assign pageCount = document | CloudinaryDocumentPageCount %}
{% for i in (1..pageCount) %}
    <a href="{{ document.Path }}">
         <img src="{{ document | CloudinaryDocumentConvert:'jpg','w_200', i}}" style="border: 1px solid
             #ddd; margin-right: 6px;" />
     </a>
{% endfor %}
Results
Notes You Should Know
Here are a couple of notes you should know about:
- As we mentioned above, when uploading a PDF Cloudinary returns the page count. This is not the case for other document types.
- When Cloudinary receives your transformation request, it processes your image in real-time and then caches the result to a file so the next time you request it with the same parameters the cached image will be returned.